Arduino’yu
Teleduino’yu kullanarak sofistike bir web platformu haline getirin!
Teleduino
hem bir ürün hem de bir hizmet sunmaktadır. Bir kere Teleduino sketch i
Arduino’ya yüklendiğinizde Teleduino sunucuya bağlanır ve internet üzerinden
dünyanın her yerinden gelen talimatları bekler.
Genellikle
gerekli hiçbir güvenlik duvarı değişikliği yoktur. Eğer ağınız DHCP’yi
destekliyor ise cihazınız üstünde herhangi bir network konfigürasyonuna
ihtiyacınız olmaz. Kolay!
Teleduino
platformu Arduino ile aşağıdakileri internet üzerinden gerçekleştirmenize
olanak sağlar.
Reset,
ping, çalışma süresi, hafızaya alma.
Pin
modları tanımlayın, dijital çıkış, analog çıkışları ayarlayın, dijital girişleri
okuyun, analog giriş okuyun, ya da tek bir API çağrısı ile tüm girişleri
okuyun.
Shift
registerı 2 yığına kadar tanımlayabilme (bu Mega’da 4’tür).
Her
yığın 512 (Mega için 1024) dijital çıkışları toplamını vererek, en fazla 32
basamaklı shift register içerebilir.
Shift
register çıkışları ayarlanabilir ya da birleştirilebilir ve zaman aşımı süresi
birleşme üzerinde ayarlanabilir. output(s) çıkışını milisaniye sayısı x için
HIGH olarak ayarlayabilirsiniz.
Tanımlama,
ve seri port okuma ve yazma.
EEPROM
okuma ve yazma
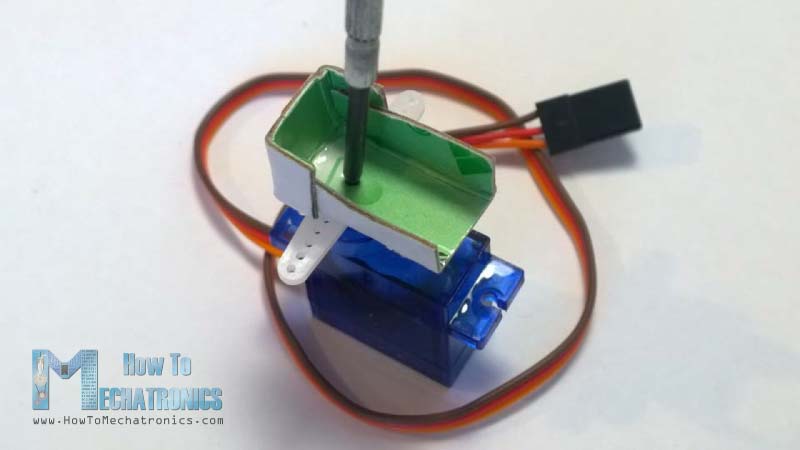
6 servoya
kadar tanımla ve konumlandır.
I2C
sensörlü arayüz ve cihazlar.
Önyükleme
sırasında ayarlanmış olan yukarıdaki fonksiyonlar için önceden belirlenmiş
değerleri ayarlayın. Önceden ayarlanmış değerler ilk olarak EEPROM un 178 bayt
ına kaydedilir.
Ne
yapabileceğini bir düşünün. Olasılıklar sonsuz.
Bu
eğitim, cihazınız için bir LED Durumu yaratarak size yol gösterecektir,
akabinde ethernet özellikli Arduino Uno’nuza teleduino kütüphane/sketch edinme
ve yüklemeyi gösterecektir.
Bu
eğitimi tamamlamak için ihtiyacınız
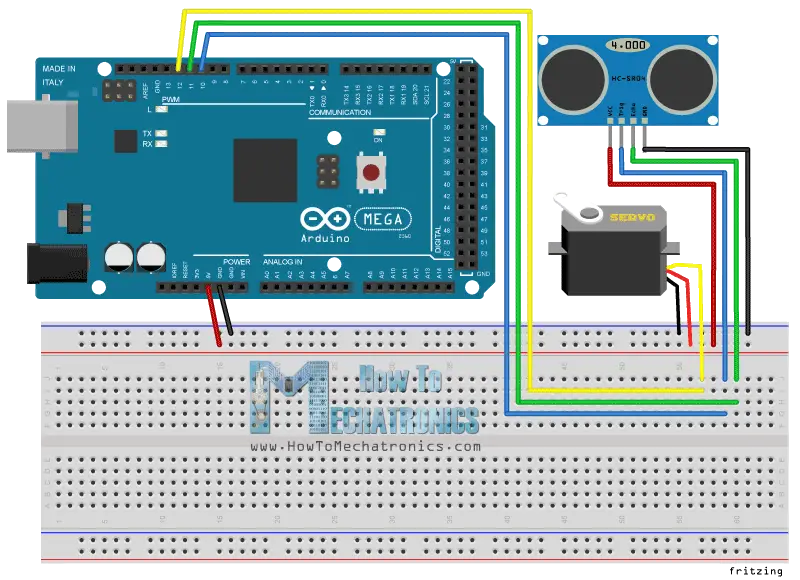
Arduino
Uno / Mega
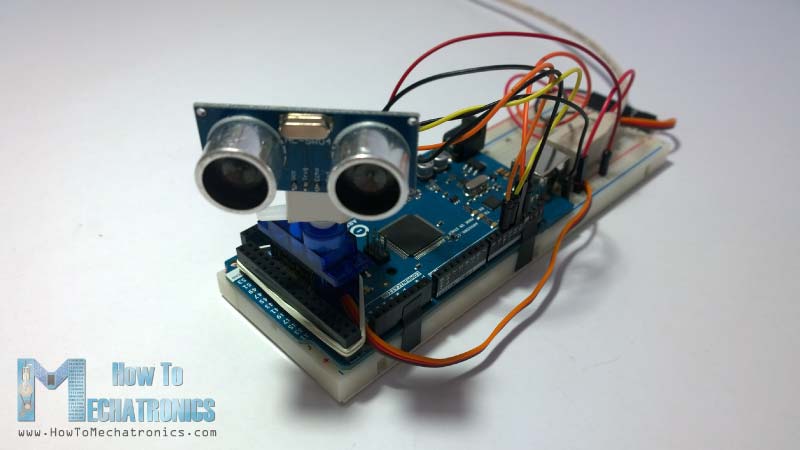
Ethernet
Kalkan (Wıznet tabanlı)
LED
1K
direnç
Adım 1:
Benzersiz API Anahtarı Edinmek
Cihazınızı
Teleduino Sunucuda benzersiz olarak tanımlamak için API anahtarı edinmeniz gerekir. Bu API
anahtarı Arduino Sketchimizin içine yüklenmesi gerekir.(Adım 4 te açıklandı).
Anahtarınız
talep edilen bir kaç dakika içinde e-posta ile size gönderilecektir.
Adım 2:
Arduino’ya Durum Led'i ekle
Teleduino
cihazınızı yeniden başlatılırken, Durum LED’i yanıp söner. Böylece neler
olduğuna göz kulak olunabilir ve ayrıca eğer bağlanma problemi yaşıyorsanız
sorun gidermeyi kolaylaştırır.
Farklı
durum kodları
1
yanma – Başlıyor
2
yanıp sönme – Ağ başlıyor
3
yanıp sönme – Sunucuya bağlanıyor
4
yanıp sönme – Doğrulama
5
yanıp sönme – Oturum sağlanan anahtar için zaten mevcut (bazen hızlı bir
yeniden başlatma sonrası bir sonraki otomatik yeniden başlat çalışacaktır.)
6
yanıp sönme Geçersiz veya izinsiz anahtar
10
yanıp sönme – Bağlantı düştü
Durum
LED’i Arduino 8 numaralı dijital pin üzerinde önceden yapılandırılmıştır.
Durum
kodlarının yanıp söndüğünü görmek için LED bağlantısına ihtiyacımız var.
LED’i
Arduino ya bağlayalım.
3.
Adım: Teleduino Kitaplığı Yükleme
Teleduino
Arduino IDE ‘niz için bir kütüphane şeklinde geliyor.
Kütüphaneyi
buradan indirin
Uno
versiyon
Mega
Versiyon
İndirdikten
sonra arşivi açın ve Teleduino 328 denilen bir klasör göreceksiniz.( Mega için
Teleduino2560') daha sonra bu klasörü Arduino IDE’nin kurulumunu yaptığınız
yerdeki libraries klasörüne kopyalayın.
Önemli
Not: Eğer bu noktada açık Arduino yazılımı Varsa kapatın ve yeniden başlatın.
Eğer yapmazsanız, kütüphane kullanılamaz ve derleme hataları alırsınız.
Adım 4: Sketch’i
Arduino’ya yükleme
Şimdi
şu an için hepimizin beklediği. Sihirli birşeyler yapma zamanı ve Teleduino
Sketchimizi Arduino’ya yükleme...
1.Adım
eşsiz API anahtarının devam etmek için gerekli olduğunu unutmayınız..
Arduino
IDE’yi açın Dosya >Örnekler> Teleduino328>
TeleduinoEthernetClientProxy
Bu
kullanacağımız sketch i açacaktır.
Dosyanın
üstüne yakın bazı ağ yapılandırma değişkenleri göreceksiniz. Değiştireceğimiz
tek şey MAC adresi bildirimi. Son bayt değiştirme meselesi 0x01 gibi bir şey
olsa bile. MAC adresleri ağ üzerinde benzersiz olmalıdır(Bu yüzden varsayılanı
değiştirmeniz önerilir). Eğer iki veya daha fazla Teleduino cihazı
ayarlıyorsanız MAC adreslerinin farklı olduğundan emin olmalısınız.
Ayarlanması
gereken tek şey, benzersiz anahtar. Referans olarak ekli resme bakın.
Varsayılan olarak bir sürü sıfır ayarlanır. Kolaylaştırmak için, benzersiz API
anahtarı aldıktan sonra ayrıca
Kopyalanan ve programa yapıştırılabilir bir biçimde anahtar olan bir
araç için bir URL alırsınız. Anahtarı
ayarladıktan sonra doğru seri port seçtiğinizden emin olun ve yükle ‘ye
tıklayın.
Herşey
iyi! Program derlenecek ve yüklenecektir.
Adım 5: Örnek
API Çağrıları ve Daha fazla Okuma
Bu
aşamada Teleduino fonksiyonel bir cihaz olması gerekir. Ethernet kablosu, bir
güç kaynağı bağlayın ve cihazınız Teleduino sunucuya bağlı olması gerekir.
Bağlantı sürecini izlemek için LED’i gözlemleyin.
Normal
çalışma sırasında durum LED’i her 5 saniyede bir yanıp sönecek. Bu herşeyin iyi
olduğundan emin olmak için cihaz üstünde sunucu kontrolü yapmaktır.
Yani,
bağlı bir Teleduino var şimdi ne olacak? Bazı güzel şeyler yapmak
istediğinize eminim, değil mi? Gerçekten çok basit bir çift API çağrıları ile
başlayalım. Bu API çağrıları Teleduino üretici yazılımının çalışan hangi sürümü
olduğunu ve cihazınızın çalışma süresini size söyleyecektir(milisaniye
cinsinden).
Aşağıdaki
URL’yi deneyin ({key} yerini benzersiz API anahtarınız ile değiştirin).
UNO
için
https://us01.proxy.teleduino.org/api/1.0/328.php?k={key}&r=getVersion
https://us01.proxy.teleduino.org/api/1.0/328.php?k={key}&r=getUptime
Mega
İçin
https://us01.proxy.teleduino.org/api/1.0/2560.php?k={key}&r=getVersion
https://us01.proxy.teleduino.org/api/1.0/2560.php?k={key}&r=getUptime